Search Knowledge Base by Keyword
- KB Home
- Intermediate Topics
- Changing the resolution of Paint Textures
Introduction
You may want to either increase or decrease the resolution of your paint textures depending on your usecase and overall goal.
This article explains where you need to make these changes.
Understanding Templates
Every UV node offered by the plugin has a corresponding template asset associated with it. The template is a simple render target whose properties are used as metadata for all the dynamically created textures (/RTs) for a given node.
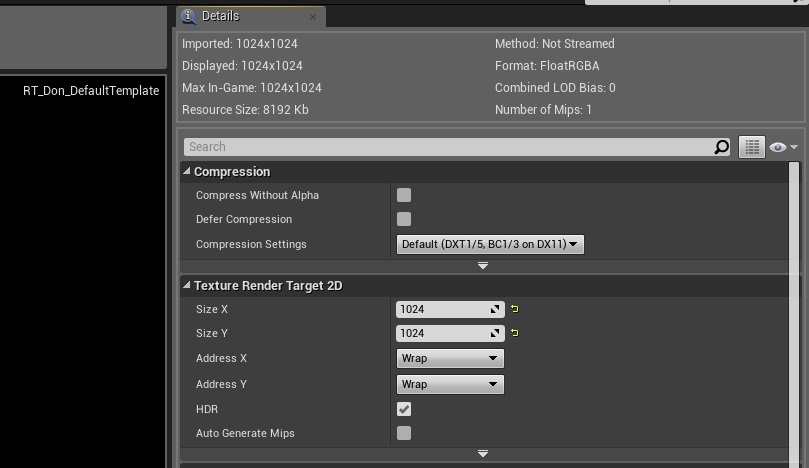
To change the texture resolution of a UV node you need to open the template associated with it and manipulate the desired properties on that asset.
RT_Don_DefaultTemplate is the template used by nearly all UV nodes in the plugin (except for the world-space ones). Just open the asset from “DonMeshPaintingContent/Textures/RenderTargets” (you’ll need to enable Show Plugin Content in your Content browser to see this) and change the resolution as desired. The default resolution of this template is 1024×1024.

For the world-space nodes you’ll need to open the individual templates for each node which you can find inside the material function. For example, if you’re using Don_World_Space_XY you’ll need to open the corresponding render target inside DonMeshPaintingContent/Textures/RenderTargets/WorldSpace/RT_Don_WorldSpaceXY_Layer0 and so on.
But I want a different resolution for each usecase/material…
This is possible too. Just duplicate your UV node of interest and point the texture object inside it to a new template prepared by you. As long as you leave the texture object paramater names and everything else intact, the plugin will pick up your new template and you’ll be good to go.
A quick suggestion on naming convention: you might want to rename your new UV nodes as Don_Mesh_Paint_UV1_2k, Don_Local_Space_XY_4k and so on to keep things organized.