Category: Material Functions


World Space UVs


On this page:


Introduction

World Space UV nodes allow you to share a single texture across you entire world with world-location based mapping for rendering your effects. They provide fast and seamless painting for landscapes, planar surfaces such as walls, floors, etc, but their use can also be extended to things like tagging certain actors or meshes in your world a certain way or even for post processing materials (like the fog-of-war system included with the sample project).

Compared to mesh-space painting, these do not require any special setup on your mesh and perform significantly faster. An advantage they have over local-space painting is the ability to share a single texture across all interested parties – be it meshes, landscape, post-processing materials or any other entity (eg: CPU driven code performing a texture lookup for simulation!).

It is worth noting that world-space UV is planar, meaning you will always lose control of one axis. You need to choose from the axes combinations of XY plane, XZ plane and YZ plane respectively and determine which plane is of most interest to you. For landscapes and most other usecases, XY is usually the right answer.


Initial Setup

World-Space painting requires you to setup your global bounds before you can start using it effectively.

Here’s how you can do that:

  1. Go to View Options, enable “Show Plugin Content” in your Content Browser.
  2. Open MPC_GlobalMeshPainting inside DonMeshPaintingContent/Materials
  3. Set the “World Min” and “World Max” vector parameters to the lower and upper bounds of your (paintable) world. This is significant, because your paint texture will be UV mapped along these bounds. The default values may not be suitable for your map so be sure to configure a suitable value for your world.
  4. If you aren’t sure how to work out the min and max values, just place a dummy sphere at your world’s extremities as a guiding point and use the sphere’s actor location (in the world outliner/details panel) to derive the min and max for your world.

Texture Resolution Setup

Because we’re sharing a single texture across a potentially large world, texture resolution quickly starts to become a factor in determining the visual fidelity of your effects. The default texture resolution used on the World Space render target is 4096×4096.

If you need to modify these, you will need to find the appropriate render target for your World Space node (see below). For example, if you’re using Don_World_Space_XY you’ll need to open the corresponding render target inside DonMeshPaintingContent/Textures/RenderTargets/WorldSpace/RT_Don_WorldSpaceXY_Layer0 and so on. Another technique for finding the right asset is to simply open your UV node (eg: Don_World_Space_XY) and click on the texture sampler inside. The default value for that is the asset whose texture resolution you’ll want to tweak.

Finally, let’s now move on to the nodes themselves:


Don World Space XY

This node facilitates painting along the global XY plane, making it ideal for landscapes, water planes, tagging actors, global effects (fog-of-war systems), etc. If you need additional layers for driving global effects that are independent of each other use the nodes suffixed _Layer1, _Layer2 etc.

For packing RGB channels with individual effects see the Packing RGB channel masks page.

The second set of nodes (Don_Landscape_Paint) are simply an alias for former, they’er functionally equivalent.
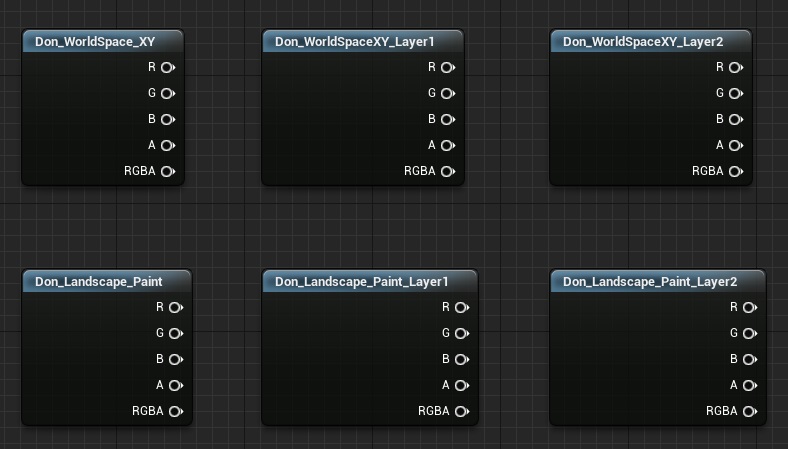
R – The red channel of this paint texture

G – The green channel of this paint texture

B – The blue channel of this paint texture

A – The alpha channel of this paint texture. This tells you which parts of the mesh have been painted and which parts haven’t. Gotcha: Because the default paint brush is an Alpha Composite brush, your alpha is inverted! This means the white parts have not been painted while the black parts have. Remember this while blending your effects.

RGBA – A float4 containing all the channels as a single output


Don World Space XZ

This node facilitates painting along the global XZ plane. One possible use for this is side-scrollers or 2D-ish games where the player’s viewport is cenetered around the XZ (/YZ) plane rather than the floor plane.

R – The red channel of this paint texture

G – The green channel of this paint texture

B – The blue channel of this paint texture

A – The alpha channel of this paint texture. This tells you which parts of the mesh have been painted and which parts haven’t. Gotcha: Because the default paint brush is an Alpha Composite brush, your alpha is inverted! This means the white parts have not been painted while the black parts have. Remember this while blending your effects.

XZ Masked Alpha – Similar to the alpha channel, but additionally masks out any pixels that are orthogonal to our plane of interest. This is very important for preventing artifacts from building up along the thickness of your planar mesh.

RGBA – A float4 containing all the channels as a single output


Don World Space YZ

This node facilitates painting along the global YZ plane. One possible use for this is side-scrollers or 2D-ish games where the player’s viewport is cenetered around the YZ (/XZ) plane rather than the floor plane.

R – The red channel of this paint texture

G – The green channel of this paint texture

B – The blue channel of this paint texture

A – The alpha channel of this paint texture. This tells you which parts of the mesh have been painted and which parts haven’t. Gotcha: Because the default paint brush is an Alpha Composite brush, your alpha is inverted! This means the white parts have not been painted while the black parts have. Remember this while blending your effects.

RGBA – A float4 containing all the channels as a single output

Local Space UVs


On this page:


Introduction

Local Space UV nodes provide rapid and seamless painting on planar surfaces such as walls, floors, etc. Their use can also be extended to planar effects on non-planar meshes, such as a character’s torso (along its YZ plane), etc. These should be your go-to nodes for creating holes in walls, excavating pits on floors, for graffiti on flat surfaces.

Compared to mesh-space painting, these do not require any special setup on your mesh and perform significantly faster. An advantage they have over world-space painting is better support for dynamic meshes; being local, local-space effects move along with the mesh, which is not true for world-space painting whose effects will need be manually relocated if a dynamic mesh moves.

Local Space painting occurs via location-based / planar mapping. The bounding box of your mesh is used to map the pixels of your mesh along any two axes from the lower extremity of the bounding box to its higher extremity. In other words, a pixel lying closest to a bounding box’s minima along the X axis will be assigned a value close to 0 (for U) while a pixel lying closest to its maxima will be assigned a value of 1. Thus, UVW is calculated in local space.

Because the mapping is planar, you will always lose control of one axis. You can only choose from UV, UW or VW, corresponding to the axes combinations of XY plane, XZ plane and YZ plane respectively. This is the main trade-off you make while choosing a local space node for your effect.

Now let’s take a look a closer look:


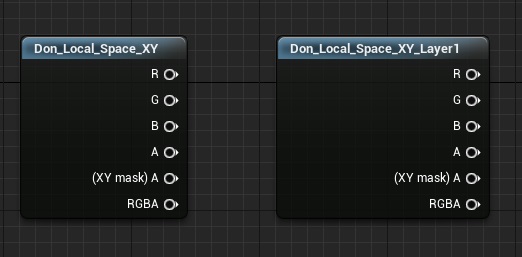
Don Local Space XY

This node facilitates painting along the local XY plane, making it ideal for floors and floor-like meshes (or effects).

Along with the regular RGBA information this node contains a special “XY masked alpha” which is used to prevent artifacts from accumulating along the omitted axis (Z in this case). The XY alpha mask is essential for things like painting graffiti because it ensures that your graffiti paint does not accumulate along the Z thickness of your mesh.

R – The red channel of this paint texture

G – The green channel of this paint texture

B – The blue channel of this paint texture

A – The alpha channel of this paint texture. This tells you which parts of the mesh have been painted and which parts haven’t. Gotcha: Because the default paint brush is an Alpha Composite brush, your alpha is inverted! This means the white parts have not been painted while the black parts have. Remember this while blending your effects.

XY Masked Alpha – Similar to the alpha channel, but additionally masks out any pixels that are orthogonal to our plane of interest. This is very important for preventing artifacts from building up along the thickness of your planar mesh.

RGBA – A float4 containing all the channels as a single output

For information on packing multiple effects into R/G/B channels see the Packing RGB channel masks article.


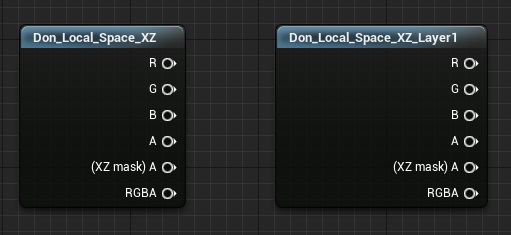
Don Local Space XZ

This node facilitates painting along the local XZ plane, making it ideal for walls and wall-like meshes (or effects). Some walls may be modeled along YZ (in which case you should use the Don Local Space YZ listed below).

Along with the regular RGBA information this node contains a special “XZ masked alpha” which is used to prevent artifacts from accumulating along the omitted axis (Y in this case). The XZ alpha mask is essential for things like painting graffiti on walls because it ensures that your graffiti paint does not accumulate along thickness of your wall.

R – The red channel of this paint texture

G – The green channel of this paint texture

B – The blue channel of this paint texture

A – The alpha channel of this paint texture. This tells you which parts of the mesh have been painted and which parts haven’t. Gotcha: Because the default paint brush is an Alpha Composite brush, your alpha is inverted! This means the white parts have not been painted while the black parts have. Remember this while blending your effects.

XZ Masked Alpha – Similar to the alpha channel, but additionally masks out any pixels that are orthogonal to our plane of interest. This is very important for preventing artifacts from building up along the thickness of your planar mesh.

RGBA – A float4 containing all the channels as a single output


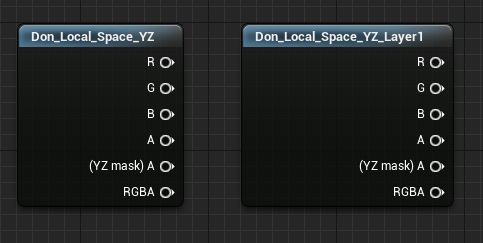
Don Local Space YZ

This node facilitates painting along the local YZ plane, making it ideal for certain types of walls and wall-like meshes (or effects). Some walls may be modeled along XZ (in which case you should use the Don Local Space XZ node listed above).

Along with the regular RGBA information this node contains a special “YZ masked alpha” which is used to prevent artifacts from accumulating along the omitted axis (X in this case). The YZ alpha mask is essential for things like painting graffiti on walls because it ensures that your graffiti paint does not accumulate along thickness of your wall.

R – The red channel of this paint texture

G – The green channel of this paint texture

B – The blue channel of this paint texture

A – The alpha channel of this paint texture. This tells you which parts of the mesh have been painted and which parts haven’t. Gotcha: Because the default paint brush is an Alpha Composite brush, your alpha is inverted! This means the white parts have not been painted while the black parts have. Remember this while blending your effects.

YZ Masked Alpha – Similar to the alpha channel, but additionally masks out any pixels that are orthogonal to our plane of interest. This is very important for preventing artifacts from building up along the thickness of your planar mesh.

RGBA – A float4 containing all the channels as a single output


Mesh Space UVs


On this page:


Introduction

Mesh-Space UV nodes allow full 3D painting by using the UV map(s) of your mesh to project your paint strokes onto a texture. Depending your usecase you may require a lightmap UV on UV1 (see Preparing your mesh for painting) or you may be able to leverage the “fast-path” via Collision UV support along UV0 (static meshes only).

In addition to the base layer, additional nodes suffixed _Layer1 and _Layer2 are available for orchestrating multiple effects that are independent of each other.

Let’s take a look at the available nodes:


Don Mesh Paint UV1

As UV1 in the name indicates, this node requires a lightmap UV on your mesh’s UV1 channel. Seamless painting is supported by this node (for procedural brushes, not for decals). Typically, skeletal meshes will exclusively use this node while static meshes have the option of using Don Mesh Paint UV0 as an optimization (see below).

The Layer1 and Layer2 variants of this node allow you to paint effects on separate layer channels that are fully independent of each other. Each layer will cost you a separate texture though.

R – The red channel of this paint texture

G – The green channel of this paint texture

B – The blue channel of this paint texture

A – The alpha channel of this paint texture. This tells you which parts of the mesh have been painted and which parts haven’t. Gotcha: Because the default paint brush is an Alpha Composite brush, your alpha is inverted! This means the white parts have not been painted while the black parts have. Remember this while blending your effects.

RGBA – A float4 containing all the channels as a single output
For information on packing multiple effects into R/G/B channels see the Packing RGB channel masks article.


Don Mesh Paint UV0

As indicated by UV0, this node uses the default UV channel of your mesh to drive painting. This node requires Collision UV support in your project to be enabled – i.e.  “Support UV From Hit Results” (under Project->Physics Settings) and also requires “Trace Complex” to be true (on your Linetrace/sweep).

While it does not support seamless painting or painting on skeletal meshes, it is a valuable part of your toolkit because the performance of this workflow is several times higher compared to a lightmap UV1 workflow, for meshes that need 3D paint projection. As always, for planar meshes or for effects that can be approximated along a plane, the world-space and local-space painting nodes should still be your first port of call.

R – The red channel of this paint texture

G – The green channel of this paint texture

B – The blue channel of this paint texture

A – The alpha channel of this paint texture. This tells you which parts of the mesh have been painted and which parts haven’t. Gotcha: Because the default paint brush is an Alpha Composite brush, your alpha is inverted! This means the white parts have not been painted while the black parts have. Remember this while blending your effects.

RGBA – A float4 containing all the channels as a single output